
DIY Wedding Flowers
My husband and I were married on June 2, 2012 and it was like a fairytale. We spent over a year planning for the day. In the end, all of that preparation paid off. Our hard work, plus the hard work of our vendors, made our dreams come true. It was perfect. (And even the little things that were less-than-perfect, somehow added to the perfection.)
Because we were working with a small budget, our wedding was almost entirely DIY (Do-It-Yourself). The venue that we chose provided the venue only. We were responsible for bringing everything else in, from food to chairs to decor. It was a big undertaking, but it allowed us to hold our dream wedding within our budget.
One of my favourite wedding projects was our flowers. The flowers were truly a labor of love. When I told friends & family that I was going to have 300 fresh flower stems delivered to my house two days before our wedding AND I was planning on designing all of our flowers myself—they thought I was crazy. Maybe I was. But I had a dream—a dream that we simply couldn’t pay a florist to accomplish. So I ordered our flowers in bulk from an online wholesaler and sure enough they arrived straight from South America two days before showtime.
Here’s the story & the photographic evidence of how it all went down!
As planned, our flowers arrived two days before the wedding. On Day One, I cleaned & prepared the flowers. Then I allowed them to sit in the water/food overnight so that they really opened up. On Day Two, I made the arrangements.
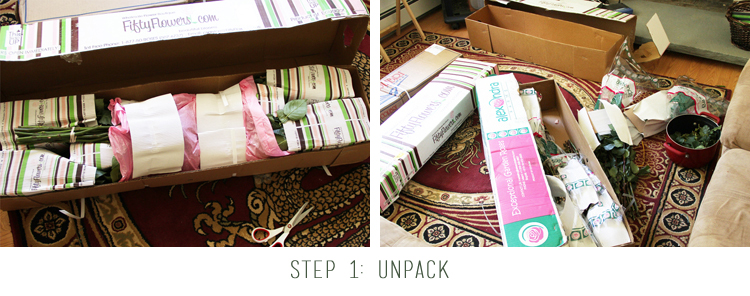
Step One: Unpack.
Be prepared for the magnitude of this task. If you’re like me, you’re used to seeing flowers on lovely display in the grocery or flower shop. This isn’t the case when you order your flowers wholesale. Your flowers will arrive in big, heavy boxes and they will be largely uncleaned. You must work quickly to get them out of the boxes because they will be very thirsty, having taken a long journey to reach you.
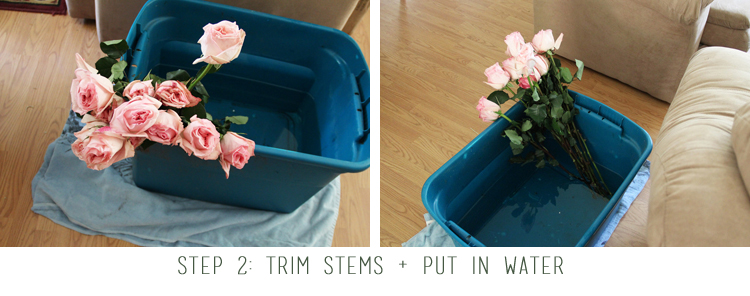
Step Two: Trim Stems + Put in Water.
You will notice that your flowers appear flat & thirsty, so you’ll want to get them in the water right away. Don’t worry about their lackluster appearance to start. With the right care they will open up & shine. You’ll want to follow the care instructions that come with your flowers. Most of the time it’s routine. Cut an inch or so off of the bottom of each stem. Pour some flower food powder into water. Place flower stems into water.
It’s a good idea to pay attention to your blooms, too. If your blooms are tightly shut, you may want to allow them a little sun. If they are already opening, you’ll want to keep them in a cool dark place, though never in front of a direct draft.
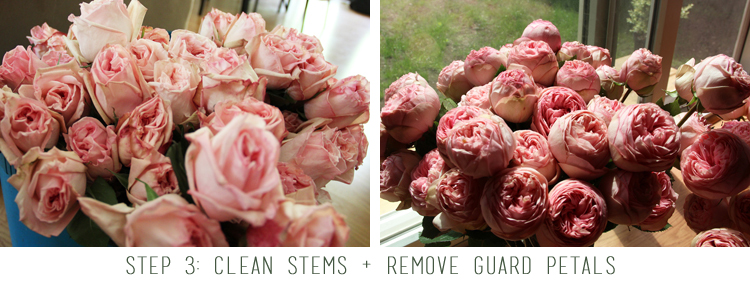
Step Three: Clean Stems + Remove Guard Petals.
Next, you’ll want to clean the stems of any unwanted leaves. For example, my roses arrived very leafy, but I only wanted a few leaves near the petals. So I removed the rest of the leaves by hand. This is time-consuming and painful (roses=thorns). If you have a pair of gardening gloves, do yourself a favor & wear them. Else you’ll end up with little pink scratches all over your hands on your wedding day, like me.
Then, you’ll remove the guard petals. This is an important thing to be aware of before your flowers arrive. Flowers with lots of petals, like roses, will arrive with guard petals in tact. These petals won’t be as lovely as the petals inside. They might be greenish, bruised, or torn. The shipper will leave these in place to buffer the brunt of the shipping damage. You’ll want to remove the guard petals and leave yourself plenty of time because this can be time-consuming, too. I was a little nervous about removing the guard petals, worried I might take off too many & end up with smallish flowers. No way! The guard petals are meant to be removed & there are plenty of lovely petals beneath them. Just look at my photographs down below!
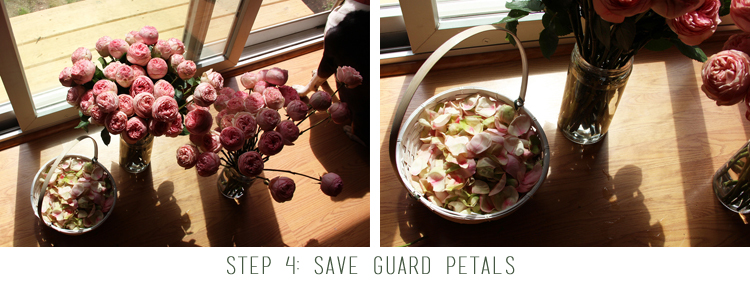
Step Four: Save Guard Petals.
Finally, if you’re planning to use petals in any of your decor or if you’ll have a flower girl throwing petals, you’ll want to keep those guard petals. Once they are all together in a basket, you can’t even see their tarnish & they are quite lovely. I dropped mine right into my flower girl’s basket as I removed them.
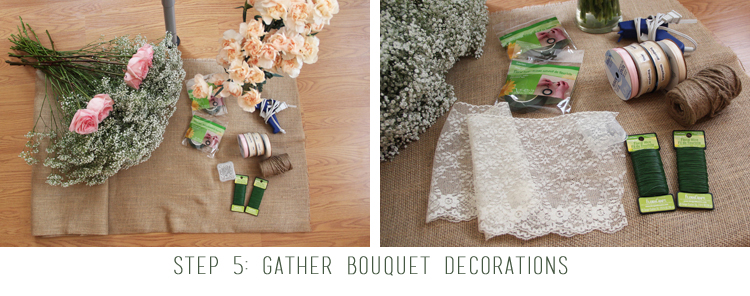
Step Five: Gather Bouquet Decorations.
You’ll want to have purchased all of your arrangement supplies well in advance. The most important thing is to have a clear idea in your mind of exactly what you plan to do. I had ordered my flowers six months in advance of our wedding. I’d been finding inspiration for months & knew exactly what I planned to do with my flowers when the time came.
For my bouquet assembly I had a simple toolkit on hand:
- Sheers
- Flower tape
- Flower wire
- Ribbon
- Burlap
- Lace
- Twine
- Hot glue gun
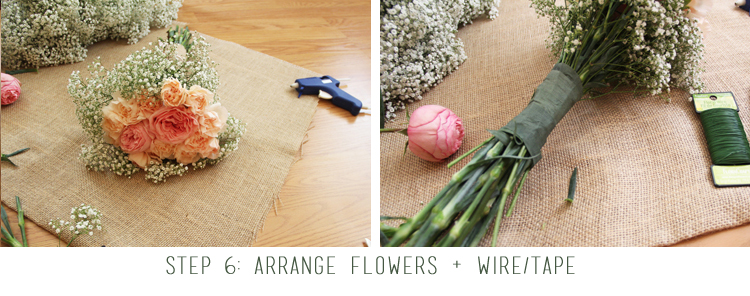
Step Six: Arrange Flowers + Wire/Tape.
Arrange your bouquets exactly as you like them. Take time to play with a few designs before you commit to binding. It’s like carpentry, “measure twice, cut once.” With flowers it’s, “arrange twice, tape once.” Originally, I thought that I’d need flower wire to hold things together. After my first bouquet, however, I realized that the wire was unnecessary. My stems were strong enough & preferred the tape alone for binding. I used plenty of tape to give each bouquet a nice, secure hold. I also made sure to leave several inches at the bottom of each bouquet where the flowers could sit in water without getting the tape & decor wet. You can always cut those long ends off later.
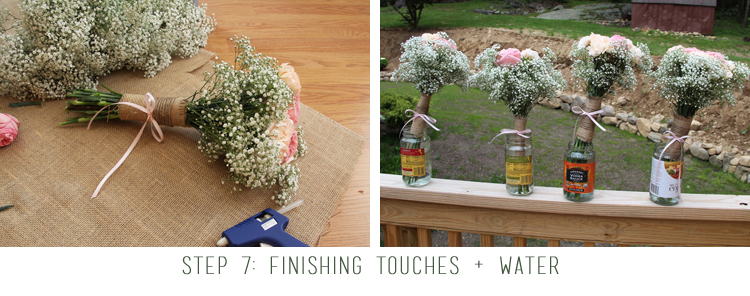
Step Seven: Finishing Touches + Water.
Finally, you’ll want to add your design touches. Each of my bouquets had its own little personality, but they had a consistent look & feel. Lots of twine, some light pink ribbon, & a touch of burlap. The hot glue gun worked wonders.
When you’re finished, place your bouquets in water with a bit of leftover flower food. I used clean pasta sauce jars and they worked just fine for overnight bouquet storage.
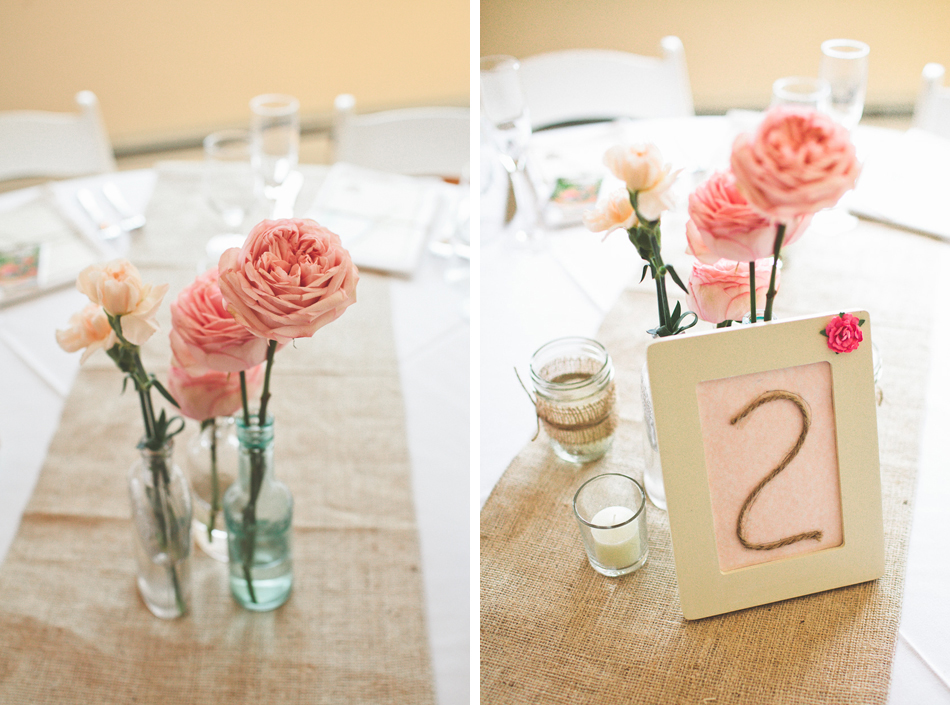
Our center pieces were quite a bit simpler. In lieu of traditional center pieces, I decided early on that I wanted to have a small collection of antique glass on each table. I spent the year leading up to our wedding combing through antique shops for “the perfect” antique & vintage glass bottles.
On our wedding day, my biggest flower task was getting all of the flowers to the venue. Once there, my day of coordinator, Kim, took over. She did the most amazing job dropping the perfect stems into each of the bottles on our ten guest tables. We also scattered mason jars wrapped with burlap, twine, or lace on each of the tables. And finally, we added a few votives in glass to give each table a soft, romantic glow.
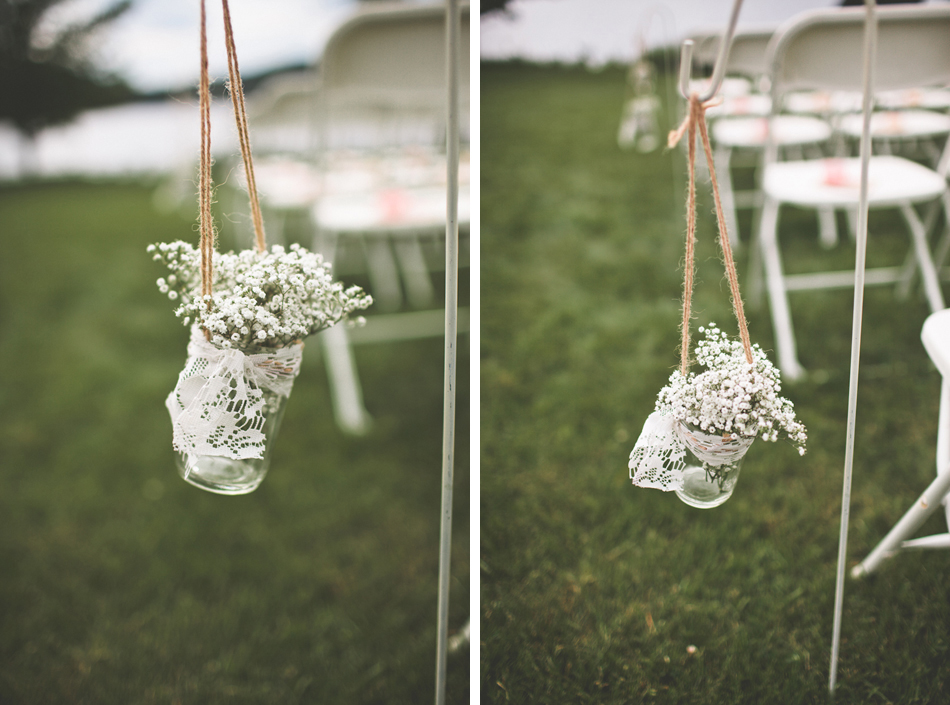
Our final flower project was the shepherd hooks lining the ceremony aisle. I ordered twelve shepherd hooks on Etsy. Unfortunately I could only get them in black so we spray painted them white to match my vision. Kim hung lace-wrapped mason jars from each hook & filled them with soft white baby’s breath to create the whimsical walkway of my dreams.
In the end, the flowers ended up being one of the most amazing details of our day. My wildest dreams were far exceeded. The flowers also made for some of the most gorgeous photographs from our day, which you’ll see below. Thanks to our amazing photographers, Tin Sparrow Studio, for that.
I learned a few valuable lessons through the DIY flower experience.
1. Be bold enough to change course in the final hours—sanity comes first. On the day before my wedding, as I was putting the bouquets together, I realized that I had to make a decision. The assembly process took longer than I anticipated & was starting to mess with my schedule. I made a quick decision to not make the boutonnieres that I’d been planning on.
No one except me knew that I’d even planned to make them, so no one was going to miss them. Still, I struggled with it a moment, and then I decided, screw it. At that point, for me, my sanity was much more important than the boutonnieres. I am so grateful that I made that decision. I’ve never even thought twice about it! Three cheers for a happy bride.
2. Consult with an expert about how many stems to purchase. All told, we had way too many flowers. I cannot be sure if consulting with an expert would have helped, but I should have at least tried. We ended up with too many flowers & I felt a little guilty about that. Still, I would have rather had too many than too few(!), but if I’d at least tried to talk to someone about my vision, perhaps I would have had some better perspective.
3. Do not let anyone tell you that: YOU CAN’T. I seriously can not explain the number of dirty looks, raised eyebrows, and faces of mortification that I encountered when I told people that I was doing my own flowers. People thought I was crazy, but it didn’t deter me. We spent well under a thousand dollars on our flowers and I received quotes of $2500 & up for what I wanted.
What I went through with the flowers was largely symbolic of what I went through with the rest of the wedding. People were always trying to tell me that I “couldn’t.” But yet I kept on keeping on. I knew one thing for certain and that was that I was not going to compromise my dream. My husband and I wanted a simple, beautiful, fun wedding. I made sure that we had just that. Going the DIY route made things a little tricky, yes, but oh my it was so worth it. Every element of our day had “us” written all over it. Our hands & hearts were stitched into the fabric of everything & we wouldn’t have wanted it any other way.








Comments (23)
Krista@TheEastCoastBride
November 27, 2012 at 8:06 pm
Hi Dena! We’re publishing your wedding tomorrow and I wanted to check out your blog and contact you about the DIY flowers post. Looks like you just posted it and I will definitely include this link! Great article and DIY – congratulations on a gorgeous wedding!
Dena Botbyl
November 28, 2012 at 7:21 am
Thank you so very much, Krista. I just love the feature. xoxo
One Love Meg
December 22, 2012 at 11:16 am
I love the flowers and the fact that you made them yourself. I hope to DIY my entire wedding. 🙂
Jade
July 12, 2013 at 3:08 am
Hi Dena,
I LOVE your DIY wedding flowers. How many bundles of babys breath did you purchase to make the bouquets? I’m determined to make my bridesmaid bouquets for my wedding.
denabotbyl
July 12, 2013 at 6:22 am
hi jade! do you plan on using the baby’s breath as an accent or as the main flower in the bouquets? if as an accent, one bundle will be more than enough. if as the main, then three should be plenty. the bundles from fiftyflowers.com were huge! i ended up with way too much. good luck!! <3
marcela
August 5, 2013 at 5:02 pm
Hi Dena!
Beautiful pictures!! Thank you so much for giving details on every step and for posting so many pictures.
I am getting married in 3 weeks and I am a bit lost about how many flowers to order. WE are doing all the arrangements because we cannot afford a florist.
I am decorating the church with 50 mason jars! and only putting babys breath in them and maybe a couple of white roses in each. I have no clue how much babys breath to order..they have told me they come in bunches but dont know how to calculate how much I need. can you give me some idea? for example, i see you used babys breath in a mason jar for your centerpieces. how much did you put in each mason jar? that would give me an idea..
also, if my wedding is on a saturday, they have told me to pick up the flowers either on thursday or friday…what do you recommend from your experience? I am buying bulk from eaither costco or wholefoods..
thank you so much!! any help would help so much!
denabotbyl
August 5, 2013 at 5:20 pm
Hi Marcela! I am not sure if all “bunches” are created equally. However, the bunches that I ordered (from fiftyflowers.com) were huge. I ordered two bunches and you could easily fill at least forty mason jars with two bunches. I highly suggest that you contact the place that you are ordering from and speak with them. For example, fifty flowers is extremely helpful. You can call them, tell them what your plans are, and they’ll tell you exactly what to order. 🙂 Best of luck to you!! xoxo
Nancy
April 3, 2014 at 8:14 pm
Very interested in amt of baby’s breath you used in mason jars. We’re looking to fill 30 pint size jars – did you mean you ordered 2 bunches w/6-9 stems each or 2 of the “10 bunch” bulk order? Thanks. nancy
Dena
April 4, 2014 at 9:23 am
This is what I ordered according to my invoice:
New Love Baby’s Breath Flower — 20 bunches for $189.99
Good luck to you! xo
Jennifer
January 19, 2014 at 3:17 pm
Thank you so much for this blog post!! I’m getting ready to order my flowers from Fifty Flowers as well, and I loved reading what you had to say. I have a couple questions, though. How many peonies/garden roses did you order? I’m looking at doing an array of similar flowers (in shades of white and cream) and am trying to figure out how many to order. Also, how many hours did it take? I was thinking a couple on the day the arrive, and then at least four the next day to get them in bouquets and arrangements. Thanks!
Dena
January 19, 2014 at 7:24 pm
Here is what I ordered: Garden Rose Powder Pink – 72 Garden Roses /// Peony Rose Bridal Piano — 72 stems /// Carnations — 150 Carnations /// New Love Baby’s Breath Flower — 20 bunches. As for time, it’s been a little while but… When they arrived, I think it took me about 3 hours to clean the roses and get all of the flowers into water. Then I believe that it took me another 3 hours to put the bouquets together (the day before the wedding). As for the arrangements, centerpieces, etc., my Day of Coordinator did all of that on my wedding day. I think it took her about 2 hours.
Good luck and please share pictures of your finished product! I would love to check it out. <3
Jennifer
February 3, 2014 at 8:43 pm
Thank you!!
Cathy
February 6, 2014 at 9:33 am
Dena, thank you so much for this post! I’m getting married next year and trying to figure out costs and our budget and doing my own flowers is one of the things I’d like to try to save some money. This is a perfect guide! Thank you so much.
I had a quick question for you: It sounds like you were able to order smaller bunches of flowers rather than the online sets (most often in 5, 10, 20 bunches, etc) for some of the fillers. Did you just call them and order it that way? Or is there a way to do it online? I’m so excited about doing my own flowers after reading your post! Thank you!
Dena
April 22, 2014 at 11:55 am
This is what I ordered according to my invoice:
New Love Baby’s Breath Flower — 20 bunches for $189.99
Good luck to you! xo
Liz
April 22, 2014 at 11:25 am
Hi Dena,
Your blog is very helpful. How many stems of baby’s breath did you use in the mason jar arrangement next to the table numbers?
Thanks!
Dena
April 22, 2014 at 11:56 am
I believe there were about 10-15 stems in each jar, depending on the “fluffiness” of each stem. 🙂
Deirdre
February 1, 2015 at 5:57 am
Hi Dena the flowers look fab! You did great job. I’m delighted it all worked out. It’s so good to read the story.
Best of luck
Dee x x
Pranali
February 1, 2015 at 11:12 am
Hi,
I am planning to make wedding boutonniere using Baby’s Breath flowers. Just wanted to know if I can make them one day before the wedding. Also how can I keep them fresh?
Alicia
February 16, 2015 at 10:40 am
Hi Dena! This blog is exactly what I needed to see because everyone thinks I’m crazy for wanting to do this myself but im currently disabled from battling melanoma so I have all the time in the world to make everything myself for the wedding. Your look is exactly what I’m going with for a backyard weddimf with coral ,burlap, mason jars, and lots of lace. The pictures you have with the large mason jars are those the peony roses? They are beautiful.
Claudia
September 3, 2015 at 1:39 pm
Thank you so much for this post. I think this is the most helpful post I’ve read all year! You made me feel so much more at ease about doing my own flowers. People gave me the same looks when I mention DIY anything. You were a breath of fresh air.
Dena
September 3, 2015 at 1:40 pm
Thanks, Claudia. So glad you found the post helpful. Have fun & best of luck.
Jewel
February 24, 2016 at 1:35 pm
What type of flowers did you use for the bouquets, I noticed roses but unsure what the others were! And thank you for this informative post!
Dena
February 24, 2016 at 1:39 pm
Carnations and baby’s breath.